
Skill Level: Beginner – Intermediate
📐 Method A Zipper Sizes: Small 13″ (33 cm) | Large 17″ (43.1 cm)
Method B: Small 12″ (30.4 cm) | Large 14″ (35.5 cm)
1. Introduction
A recessed zipper panel gives your bag a clean, structured zipper opening — the zip sits neatly inside the bag with no raw edges or hardware showing at the sides. It is one of those techniques that looks impressive but is very achievable once you know the method.
In this tutorial we cover two different methods for making a RECESSED ZIPPER PANEL. Both start the same way — folding the zipper tape ends at 90 degrees — but differ in how the panels are attached to the zipper. Choose the method that suits your bag pattern.
| Method A — Lining Panel Method | Method B — Wrap & Turn Method | |
| Zipper sizes | Small 13″ (33 cm) Large 17″ (43.1 cm) | Small 12″ (30.4 cm) Large 14″ (35.5 cm) |
| Panel pieces | RECESSED ZIPPER PANEL + separate LINING PANEL | Single RECESSED ZIPPER PANEL wraps around zipper |
| Technique | Panels sewn right sides together, then flipped and topstitched | Panel folded over zipper, sewn, then turned right side out |
| Best for | Cleaner inside finish with a separate lining layer | Firmer, more structured edge — great for stiffer fabrics |
2. What You’ll Need
Notions & Tools
- Main fabric for RECESSED ZIPPER PANELS
- Lining fabric for RECESSED ZIPPER LINING PANELS (Method A only)
- Double-sided tape
- Matching thread
- Clips or pins
- Zipper foot
- Smooth-jaw pliers (optional, helpful for bulk)
- Ruler / tape measure (inches and cm)
- Fabric marker or chalk
Zipper Sizes
| Method | Size | Zipper Length |
| Method A | Small | 13″ (33 cm) |
| Method A | Large | 17″ (43.1 cm) |
| Method B | Small | 12″ (30.4 cm) |
| Method B | Large | 14″ (35.5 cm) |
3. Key Terms
- RECESSED ZIPPER PANEL: The outer fabric panel that wraps around or is sewn to the zipper tape.
- RECESSED ZIPPER LINING PANEL: The lining piece that backs the RECESSED ZIPPER PANEL (Method A only).
- Zipper End: A small hardware cap attached to the open end of the zipper tape to finish it neatly.
- Right side (RS): The printed or ‘pretty’ side of the fabric.
- Wrong side (WS): The back or plain side of the fabric.
- Topstitch: A visible row of stitching on the right side, 1/8″ (3 mm) from the edge unless otherwise stated.
4. Step-by-Step Instructions
Step 1 — Prepare the Zipper Tape (Both Methods)
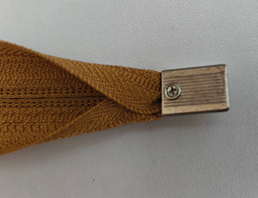
This step is the same for both Method A and Method B. The zipper tape ends are folded at 90 degrees before attaching to the panels — this is what creates the neat, recessed look.
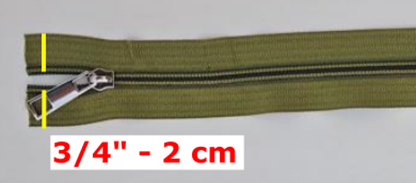
- Mark 3/4″ (2 cm) from the starting edge of the zipper tape — the end where the zipper closes to the left. Use the correct zipper size for your chosen method and size (see table above).
- Pinch the zipper tape on the drawn line and fold it 90 degrees as shown. Pin or clip in place.
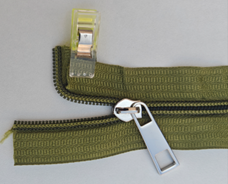
- Topstitch to hold the fold in place.
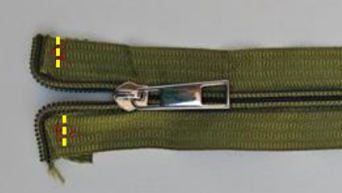
- Repeat steps 1–3 for the other end of the zipper tape.
| 💡 Tip: Fold and stitch both ends of the zipper tape before you attach it to any panels — it is much easier to handle at this stage than after the panels are attached. |
| Method A — Lining Panel Method Zipper sizes: Small 13″ (33 cm) | Large 17″ (43.1 cm) |
Step 2A — Prepare the Recessed Zipper Panels
- Place the RECESSED ZIPPER PANELS wrong side up.
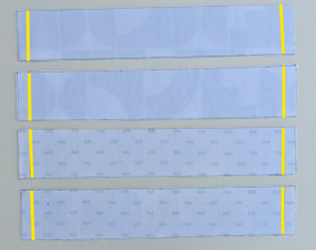
- Measure 3/8″ (1 cm) from each short edge and draw a line parallel to the short edge.
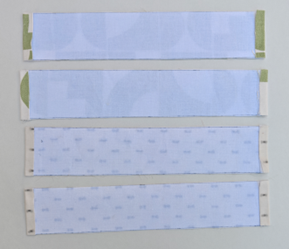
- Apply a strip of double-sided tape along the drawn line. Fold both short ends of all RECESSED ZIPPER PANELS over along the tape line and paste down.
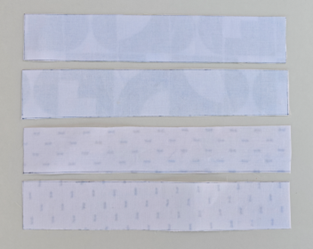
Step 3A — Attach the Zipper to the Panel
- Place the RECESSED ZIPPER PANEL right side facing up.
- Place the prepared zipper tape on top, right side facing down. The zipper tape should start 3/8″ (1 cm) from the left edge of the RECESSED ZIPPER PANEL.
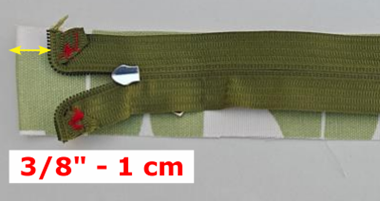
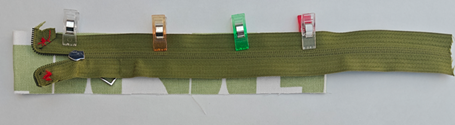
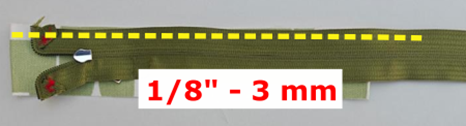
- Topstitch with a 1/8″ (3 mm) seam allowance along the zipper tape to attach it to the RECESSED ZIPPER PANEL.
Step 4A — Attach the Lining Panel
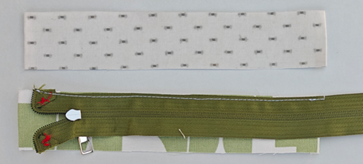
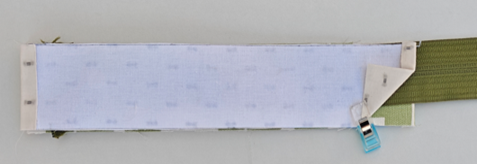
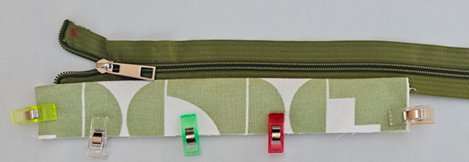
- Place the RECESSED ZIPPER LINING PANEL on the panel already sewn to the zipper tape, right sides together, matching the folded edges.
- Sew along the top with a 3/8″ (1 cm) seam allowance.
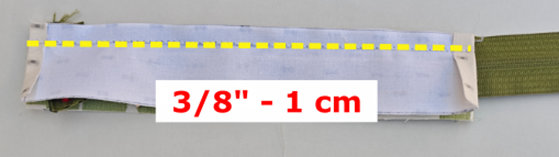
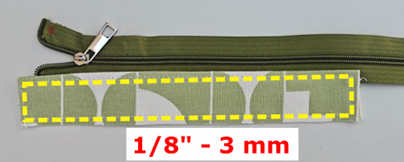
- Flip the panels so that the wrong sides are together. Clip in place.
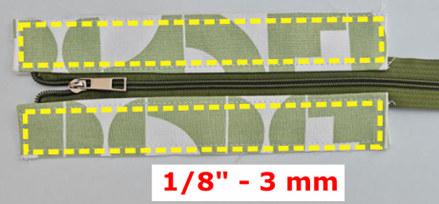
- Topstitch along the edges with a 1/8″ (3 mm) seam allowance.
- Repeat to sew and topstitch the other edges.
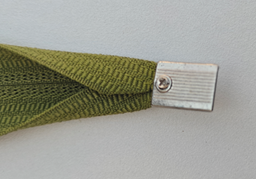
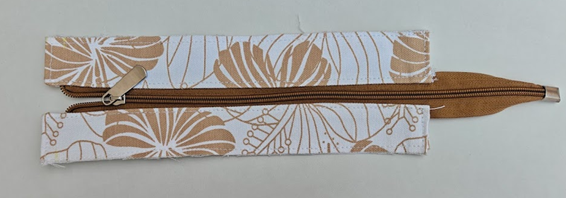
- Attach the ZIPPER END to the other end of the zipper tape to finish.
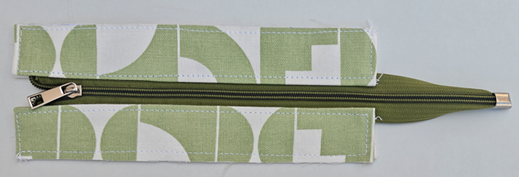
| 💡 Tip: When flipping the panels wrong sides together, take a moment to align all edges precisely before clipping — this makes the topstitching step much neater. |
| Method B — Wrap & Turn Method Zipper sizes: Small 12″ (30.4 cm) | Large 14″ (35.5 cm) |
Step 2B — Prepare the Recessed Zipper Panels
- Place the RECESSED ZIPPER PANELS wrong side up.
- Measure 3/8″ (1 cm) from each short edge and draw a line parallel to the short edge.
- Apply a strip of double-sided tape along the drawn line. Fold both short ends of all RECESSED ZIPPER PANELS over along the tape line and paste down.
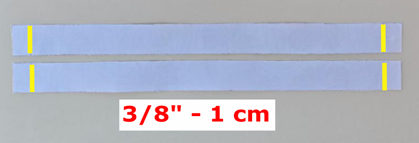
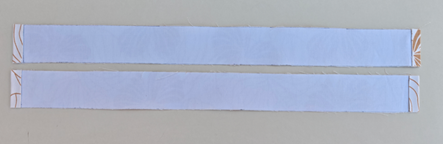
Step 3B — Mark the Zipper Placement
- On the right side of both RECESSED ZIPPER PANELS, measure and mark the centre of the panel along the long edge.
- From the centre mark, measure 3/4″ (1.9 cm) towards the left and mark a second point. This is your zipper placement mark.
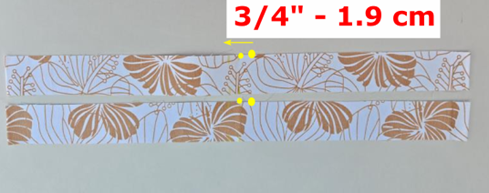
Step 4B — Attach the Zipper and Wrap
- Place the prepared zipper right side down, aligning the angled end of the zipper tape with the 3/4″ (1.9 cm) placement mark.
- Ensure the zipper stops exactly at the 3/4″ (1.9 cm) mark. Sew with a 1/8″ (3 mm) seam allowance.
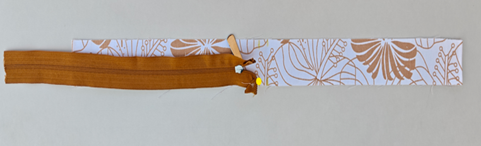
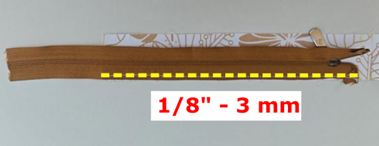
- Fold the RECESSED ZIPPER PANEL over to the opposite side of the zipper tape, stopping at the end of the panel.
- Sew slowly along the side, keeping the zipper sandwiched between the layers with a 1/4″ (6 mm) seam allowance.
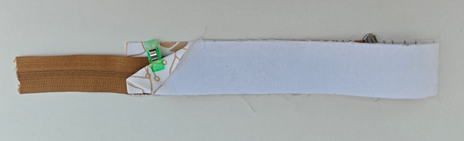
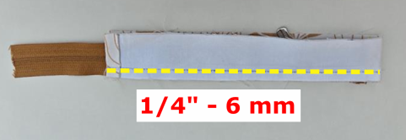
- When you reach the zipper corner, reduce the stitch length and sew carefully across the folded corner.
- Trim a small amount from the seam allowance at the fold to reduce bulk if needed.
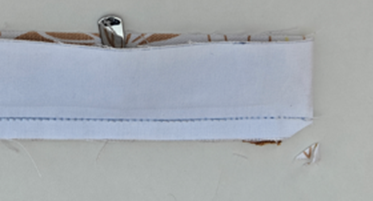
- Turn the RECESSED ZIPPER PANEL right side out.
- Align all edges neatly and secure with clips.
| 💡 Tip: You can gently squeeze bulky areas with smooth-jaw pliers to reduce thickness and make the seam more manageable before topstitching. |
- Topstitch around all sides of the RECESSED ZIPPER PANEL with a 1/8″ (3 mm) seam allowance.
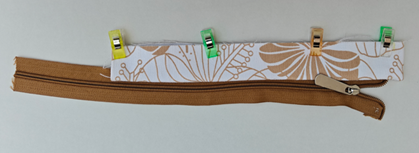
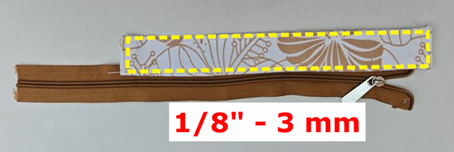
- Repeat the same steps to attach the second RECESSED ZIPPER PANEL to the other side of the zipper.
- Make sure the bottom folds of both panels line up and the top edges align evenly.
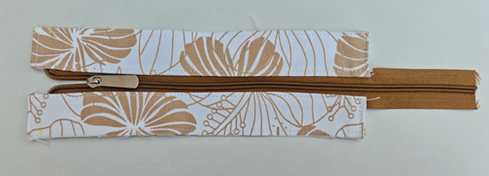
- Attach the ZIPPER END to the other end of the zipper tape to finish.
| 📌 Note: Check that both RECESSED ZIPPER PANELS are mirror images of each other before topstitching — the zipper pull should open smoothly from one end to the other with no puckering at the corners. |
5. Pattern Details & Where to Buy
| Techniques | Recessed zipper panel — two methods |
| Difficulty | Beginner – Intermediate |
| Seam Allowance | 3/8″ (1 cm) unless otherwise stated |
| Pattern Pieces | RECESSED ZIPPER PANEL, RECESSED ZIPPER LINING PANEL (Method A) |
| Method A Zips | Small 13″ (33 cm) | Large 17″ (43.1 cm) |
| Method B Zips | Small 12″ (30.4 cm) | Large 14″ (35.5 cm) |
| Buy patterns | www.hemazingbags.com |
6. FAQs
Q: Which method should I choose?
Method A (Lining Panel) gives a cleaner inside finish because the lining panel backs the zipper neatly. Method B (Wrap & Turn) creates a firmer, more structured edge and works particularly well with stiffer exterior fabrics. Check your bag pattern to see which method is specified.
Q: Can I use double-sided tape instead of pinning the panels?
Yes — and for vinyl or cork fabrics, double-sided tape is strongly recommended over pins, which leave permanent holes. Use it anywhere the instructions say to pin or clip, and check that your tape is compatible with your fabric before you begin.
Q: My corners are bulky after turning. How do I fix this?
Trim the seam allowance at each corner before turning, and use smooth-jaw pliers to gently compress the seam after turning. Reducing your stitch length as you sew around corners also helps keep everything tidy.
Q: Why do I fold the zipper tape at 90 degrees?
Folding the zipper tape ends creates an angled corner that allows the panel to sit flush with the edge of the bag. Without this fold, the zipper hardware would poke out at each end and the panel would not lie flat.
Q: Can I use these methods with a bag pattern that uses a different zipper size?
Yes! The method itself works with any zipper length — just follow your bag pattern’s zipper size. The 3/4″ (2 cm) fold measurement at each end of the zipper tape stays the same regardless of the total zipper length.
7. Did You Make This?
I would love to see your finished bags! Share your makes on Instagram or Facebook and tag on
Facebook: https://www.facebook.com/groups/hemazingbags
Instagram: https://www.instagram.com/hemazingpatterns/
Pinterest: https://in.pinterest.com/hemazingpatterns/
Website: https://hemazingbags.com/
Looking for a pattern that uses a recessed zipper? Check these out on https://hemazingbags.com/
- Advi Crossbody Bag – 2 Sizes
- Monica Hand Bag – 2 Sizes
- Aira Shoulder Bag https://hemazingbags.com/b/airashoulderbag
Sign up for the Hemazing Patterns newsletter at https://hemazingbags.com/ and never miss a new tutorial.
8. Pinterest Image
| 💡 Tip: Create a vertical graphic (1000 x 1500 px). Suggested text overlay: “Two Ways to Sew a Recessed Zipper Panel – Bag Making Tutorial | hemazingpatterns.com”. Show a close-up of a finished recessed zipper panel on a bag. Schedule the pin to go live at the same time as this post. |
Pinterest: https://in.pinterest.com/hemazingpatterns/