
Skill Level: Complete Beginner ⏱ Time: 20–30 minutes 📐 Finished Width: 3/4″ (2 cm) or 1″ (2.5 cm)
1. Introduction
A well-made crossbody strap can make or break a bag. Whether you are attaching it to a pouch, a tote, or a structured bag, getting the strap construction right means it will sit flat, stay strong, and look completely professional. In this tutorial I will walk you through sewing a fabric crossbody strap from start to finish — including joining two shorter pieces if your fabric is not long enough.
This method works for any bag pattern that calls for a fabric strap. The steps are identical for both widths — the only difference is the cut width of your fabric. You will end up with a clean, sturdy strap with a strap adjuster and two swivel clips — fully adjustable and ready to attach to your bag.
2. What You’ll Need
Pattern Pieces
Choose your strap width from the table Choose your strap width from the table below. The length is the same for both sizes.below. The length is the same for both sizes.
| Finished Width | Cut Width | Cut Length | Qty |
| 3/4″ (2 cm) | 3″ (7.6 cm) | 56″ (142.2 cm) | Cut 1 |
| 1″ (2.5 cm) | 4″ (10.2 cm) | 56″ (142.2 cm) | Cut 1 |
💡 Tip: If your fabric is not long enough, cut 2 shorter pieces that together measure at least 56″ (142.2 cm) in length and join them as described in Step 1.
Hardware
- 1 × Strap Adjuster — 3/4″ (20 mm)
- 2 × Swivel Clips — 3/4″ (20 mm)
Notions & Tools
- Matching thread
- Pins or wonder clips
- Iron and ironing board
- Ruler / tape measure — with both inches and cm
- Fabric marker or chalk
- Sewing machine
- Rivets and rivet setter (optional — alternative to stitching the adjuster end)
3. Before You Begin
Seam Allowance
All seam allowances are 1/2″ (1.2 cm) unless otherwise stated.
Key Terms
- CROSSBODY STRAP: The fabric piece(s) that form the adjustable shoulder strap.
- Strap Adjuster: The sliding hardware piece that allows the strap length to be adjusted.
- Swivel Clip: The hardware at each end of the strap that clips onto the D-rings of the bag.
- Topstitch: A visible row of stitching on the right side of the fabric, close to a seam or edge.
4. Step-by-Step Instructions
Step 1 — Join the Strap Pieces (if using fabric)
| 📌 Note: Skip this step if you are cutting the CROSSBODY STRAP as one long piece. |
- Pin both CROSSBODY STRAP panels right sides together, matching all raw edges along one short edge.
- Sew along that short edge with a 1/2″ (1.2 cm) seam allowance.
- Press the seam open flat.
Step 2 — Prepare the Strap
- Fold both short edges of the CROSSBODY STRAP 1/8″ (3 mm) in and press.
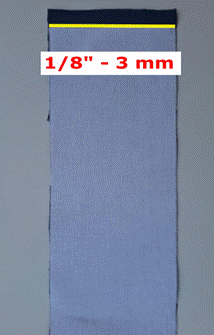
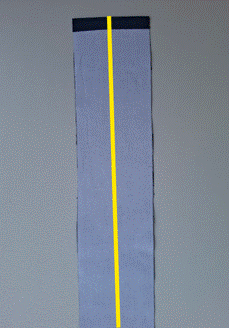
- Mark a centre line down the full length on the wrong side of the CROSSBODY STRAP.
- Fold each long raw edge in to meet the centre mark and press.
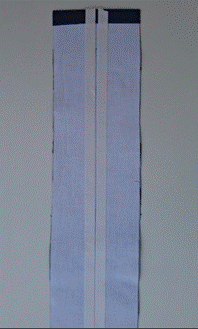
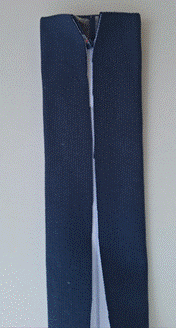
- Fold the strap in half again along the centre line and press firmly. The CROSSBODY STRAP should now measure 3/4″ (2 cm) or 1″ (2.5 cm) wide, depending on your chosen size.
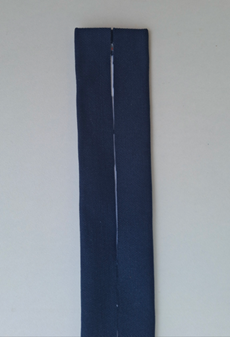
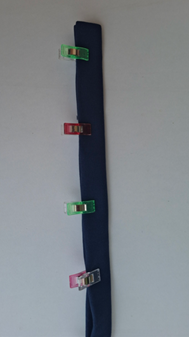
- Topstitch all around the CROSSBODY STRAP with a 1/8″ (3 mm) seam allowance.
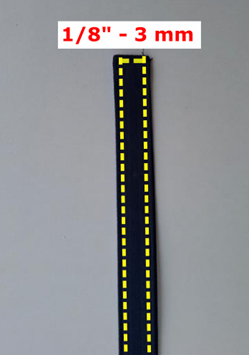
| 💡Tip: Use clips rather than pins to hold the folded strap flat while stitching — they grip the layers without distorting the folds. |
Step 3 — Attach the Hardware
- Thread one end of the CROSSBODY STRAP around the middle bar of the Strap Adjuster. Fold the wrong sides together and sew a square stitch to secure the end, or add a rivet for extra strength.
- Slide a Swivel Clip through the other end of the CROSSBODY STRAP.
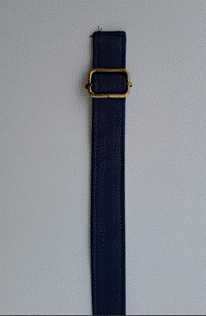
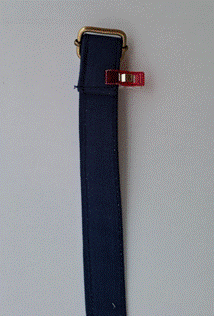
- Thread that same end back through the Strap Adjuster, covering the loop stitched in the previous step.
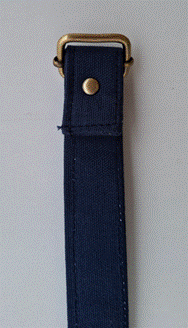
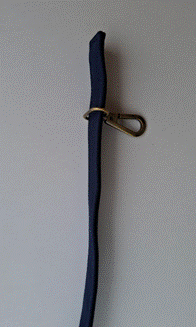
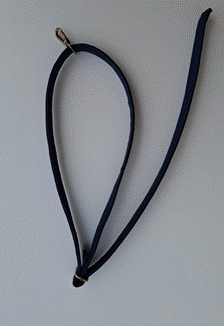
- Slide the second Swivel Clip onto the remaining loose end of the CROSSBODY STRAP until it is 1″ (2.5 cm) from the end. Fold the wrong sides together and sew a square stitch to secure.
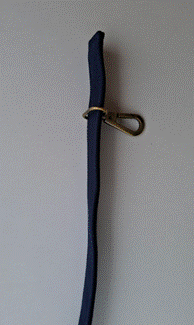
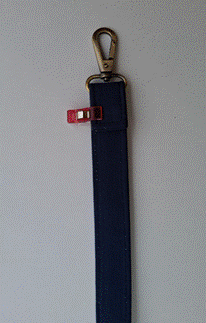
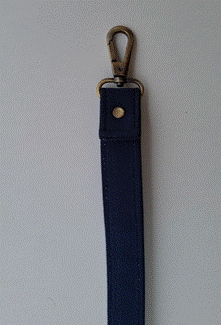
| 💡Tip: Sew a reinforced box stitch (stitch a rectangle then an X inside it) at each hardware attachment point for maximum strength — this is where the most stress is placed when the bag is worn. |
5. Finished Project Photos
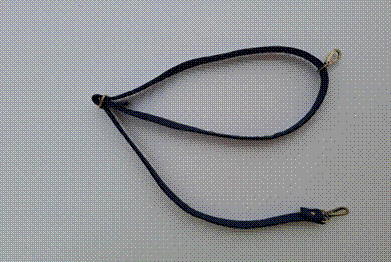
- Flat lay of the completed CROSSBODY STRAP
- Close-up of the Strap Adjuster end
- Close-up of the Swivel Clip ends
- Strap attached to the finished bag — lifestyle shot
6. Pattern Details & Where to Buy
| Pattern Name | Crossbody Strap |
| Finished Width | 3/4″ (2 cm) or 1″ (2.5 cm) |
| Difficulty | Complete Beginner |
| Seam Allowance | 1/2″ (1.2 cm) throughout |
| Pattern Pieces | CROSSBODY STRAP |
| Techniques | Straight stitch, topstitching, hardware attachment |
| Buy the pattern | https://hemazingbags.com/ . Also on Sew Modern Bags |
7. FAQs
Q: What fabric works best for a crossbody strap?
Medium to heavy weight woven fabrics work best — cotton canvas, denim, cotton-linen blend, or a contrast fabric. Avoid stretchy fabrics as they will not hold their shape under the weight of a bag.
Q: Can I use cork or vinyl for the strap?
Yes! If using cork or vinyl, do not iron. Use double-sided tape instead of pressing to hold the folds in place and use a walking foot or Teflon foot on your machine. Do not use pins — use clips only.
Q: How do I make the strap longer or shorter?
Simply adjust the cut length of the CROSSBODY STRAP to suit your needs. The finished strap will be approximately 3″ (7.6 cm) shorter than the cut length due to the seam allowance and fold-in at each short end. The Strap Adjuster allows further adjustment when the strap is in use.
Q: My topstitching is not straight — any tips?
Use a seam guide or a piece of tape on your machine bed as a visual guide. Sew slowly and keep your eyes on the guide, not the needle. A longer stitch length (3–3.5 mm) also looks cleaner on straps.
8. Did You Make This?
I would love to see your finished bags and straps! Share your makes on Instagram or Facebook and tag @HemzingPatterns.
Looking for more patterns to use this strap with? Check these out on Hemazing Patterns:
- Monica Crossbody Bag — 2 Sizes https://hemazingbags.com/b/monica-crossbody-bag-pattern
- Advi Crossbody Bag – 2 Sizes
- Monica Hand Bag – 2 Sizes
- Aira Shoulder Bag https://hemazingbags.com/b/airashoulderbag
- Magi Crossbody Bag – 2 Sizes
- Sling It Mini Sling – 2 sizes
Never miss a new pattern or tutorial — sign up for the Hemazing Patterns newsletter at https://hemazingbags.com/
9. Pinterest Image
follow us on
Facebook: https://www.facebook.com/groups/hemazingbags
Instagram: https://www.instagram.com
Pinterest: https://in.pinterest.com/hemazingpatterns/
Website: https://hemazingbags.com/